Create New Exhibitions This article will explain how to add an exhibition on your gallery profile.
Exhibitions are important channels and events to bring awareness to artists your gallery represents and promote artworks to a wide audience. Artland allows you to log and digitize physical exhibitions and display selected artworks, introduce participating artists and much more.
This article is divided into the following sections:
- Create New Exhibitions as a Basic or Premium 3D Partner
- Create New Exhibitions as a Premium VR Partner
- Further Information on Creating an Exhibition
- See Your Exhibitions
- Edit Your Exhibitions
- Delete Your Exhibitions
Create New Exhibitions as a Basic or Premium 3D Partner
To create an exhibition, first go to your gallery profile and then click on “Add Exhibition” in the Admin Toolbar.

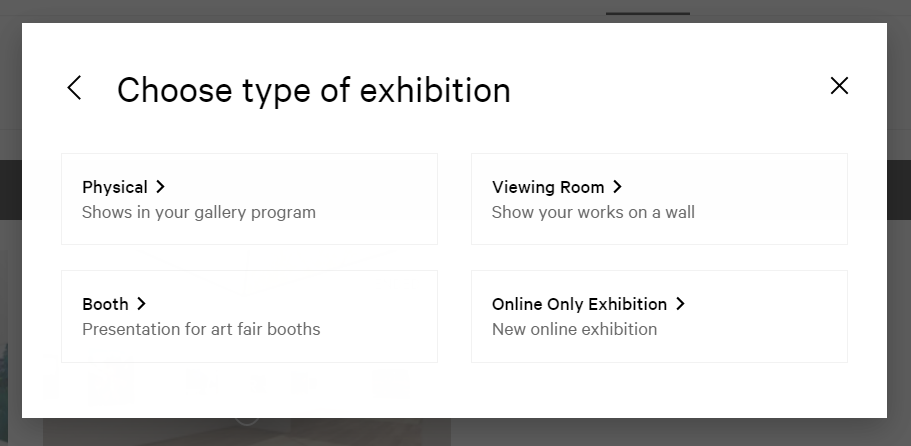
A new form page will appear where you can choose the type of exhibition.
Then you can add all the information about the show in the correspondent sections.
You can choose among four different kind of exhibitions:
-
Physical exhibitions
-
Online exhibitions - for exhibitions that are shown only online
-
Booth - for exhibitions that are part of fairs, either physical or online
-
Viewing Room - to know more about Viewing Rooms, please check this article.

If you are a Premium 3D partner, the 3D recording of your exhibition will be created and published by our 3D team and you will be notified by email. If you wish your exhibition not to be publicly visible, remember to tell the team at the moment of the booking. To book a recording, please contact 3d@artland.com.
Create New Exhibitions as a Premium VR Partner
To create an exhibition, go to your gallery profile and click on “Add Exhibition” in the Admin Toolbar.

Choose if you want to create a VR Exhibition or another type of exhibition. To know more about how to create a VR Exhibition, please check this article out.
Click on "Other Exhibitions". Now, you can choose among four different kind of exhibitions:
-
Physical exhibitions
-
Viewing Room - to know more about Viewing Rooms, please check this article
-
Booth - for exhibitions that are part of fairs, either physical or online
-
Online exhibitions - for exhibitions that are shown only online
Further Information on Creating an Exhibition
- Privacy Settings
You can select the status of your show (public or private) via the token at the beginning of the exhibition's edit session. For more info about how to see private exhibitions, read this article.

- Basic Information
In this section, you can chose the type of exhibition and add basic information about your show, such as title, dates, description, artists and artworks.
- Title: add the title of the exhibition.

- Dates: add the start and the end date of the exhibition.

- Description: add a description of the exhibition.

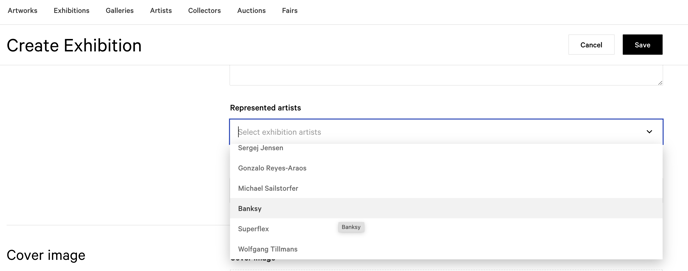
- Represented Artists: enter the name of the artist you wish to add.
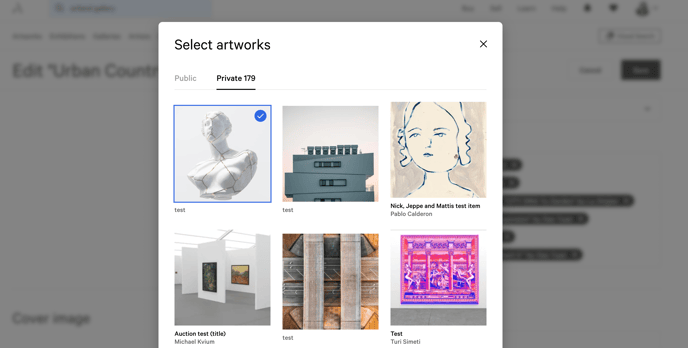
- Artworks: If you have already uploaded the works to your profile, select the ones you want to attach to the exhibition.
You can undo this action by deselecting the artworks in the same way.
Otherwise, go to the edit page of the exhibition to which you want to link the work, click on the "+Add Artworks" button of the Admin Toolbar and click on the option "Add Existing Artworks".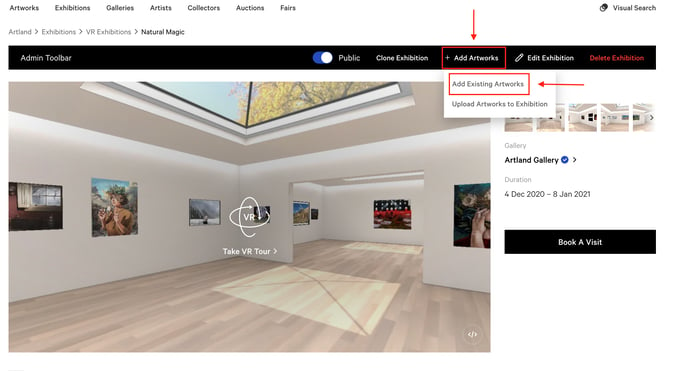
Select the works you want to add to your exhibition.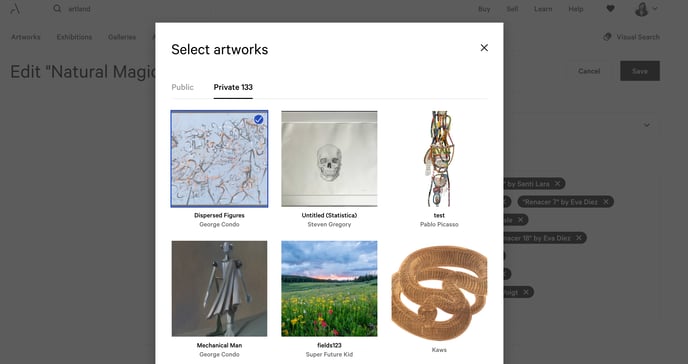
Whereas if you still have to upload the works to attach to your exhibition, click on the option "Upload Artworks to Exhibition".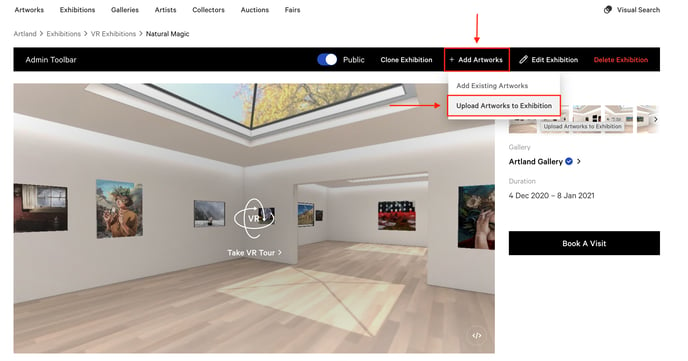
Enter the details of the works you want to add to your exhibitions.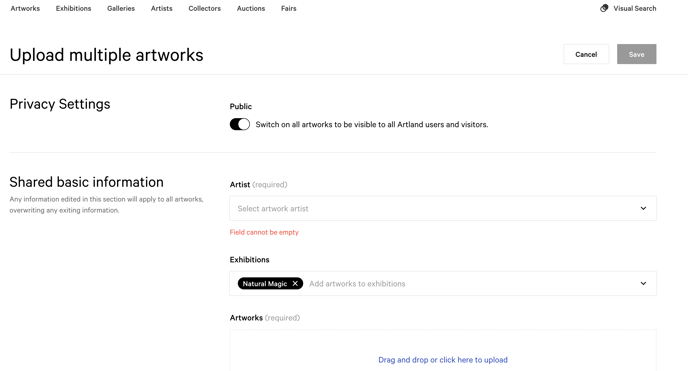
- Cover Image and Detail Images
Here you can upload the cover and detailed images of your exhibition.
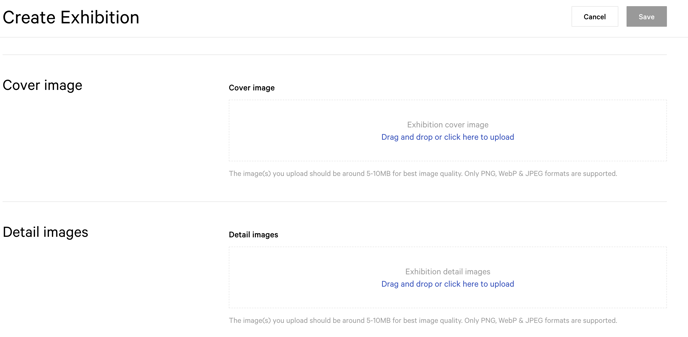
Images should have an aspect ratio of 16:9 and be between 5 and 10MB for best image quality.
Remember to save the changes.

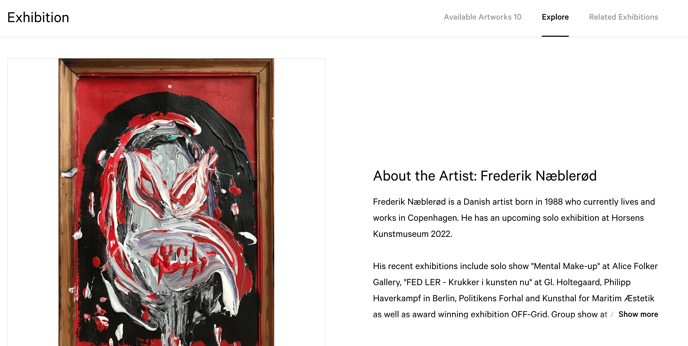
You can share compelling information about your exhibitions by creating an "Explore Area" in the following step. Please read more about it here.
See Your Exhibitions
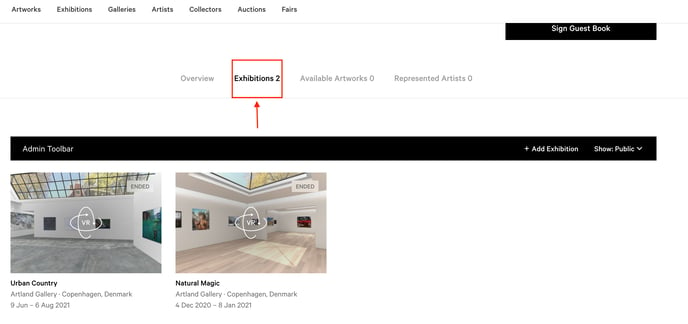
By clicking on the tab "Exhibitions" on your gallery profile you will be able to see all past, upcoming and current Exhibitions.
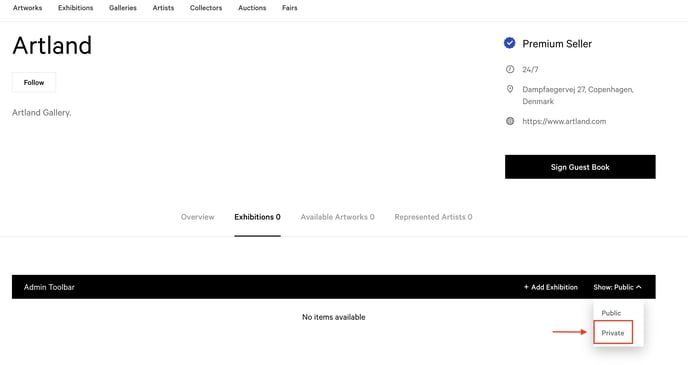
To see your private Exhibitions, scroll to your Exhibition Admin Toolbar and click on "Show: Public". There, you can choose to show "Private" instead of "Public" exhibitions.
You can select the private mode when your exhibition is over and you do not want it to be public anymore. In this way, your private section would also be your online archive.
To learn how to change the exhibition from private to public, or vice-versa, please read this article.
Edit Your Exhibitions
To edit your exhibition, first go to the ''Exhibitions'' section of your gallery profile.
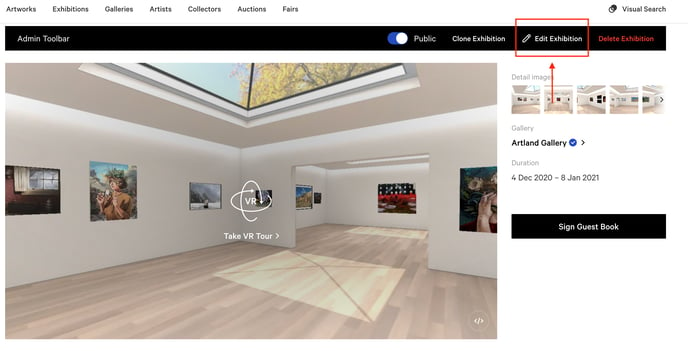
 Then go to the exhibition you would like to edit and click on the "Edit Exhibition" button in the upper right corner of the Admin Toolbar.
For more information about how to edit exhibitions, read this article.
Delete Your Exhibitions
To delete and exhibition, first go to the ''Exhibitions'' section of your gallery profile.
 Then click on the three-dots button on the upper right corner of your Exhibition thumbnail and then select "Delete".

Or go to the exhibition you want to delete and click on the "Delete Exhibition" button on the upper right corner of the Admin Toolbar.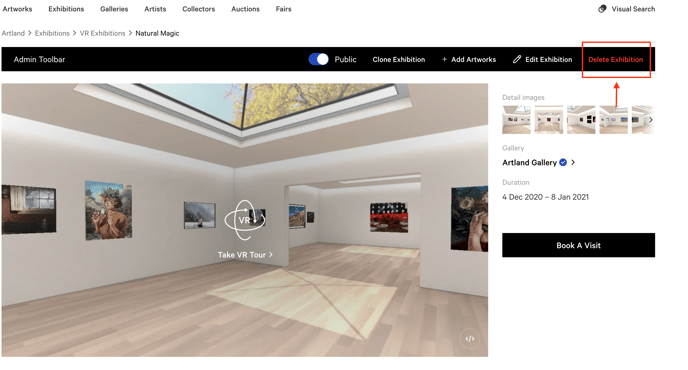
Please note that the deletion of an exhibition is irreversible. Thus, instead of deleting an exhibition, we suggest to move the exhibition to the private section.
To do so, go to your exhibition's page and switch the toggle located in the top left corner from "Public" to "Private".
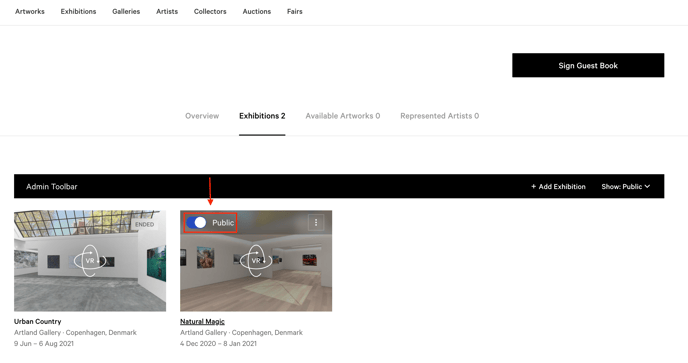
For more information about how to see private exhibitions, read this article.
